• Skip to primary navigation
  • Skip to main content
  • Skip to primary sidebar
  • Skip to footer
lifeonfern.com
  • Welcome to Life on Fern!
  • Fern Design
    • Dusty to Dreamy: Ultimate Attic Renovation
    • DIY Greenhouse Built with Repurposed Windows
    • Functional Rustic-Style Mobile Chicken Coop
    • The BEST Homeschool Room Renovation EVER
    • The Most Adorable Western-Themed Baby Boy Nursery
    • Storybook-Esque Woodland Animal & Unicorn Mural!
  • Fern Acres Homeschooling
    • How to Start a Kids Book Club for Homeschoolers Using Living Books!
    • Things I Love as a Busy Homeschooling Mama: Essentials That Help Fill My Cup!
    • Back to Homeschool: Things I’m Doing Differently This Year!
    • Homeschool Curriculum for Toddlers and Preschoolers: Fun & Play!
    • Top reasons why we are a homeschool family and LOVE IT.
    • A Peek Inside Our Daily Homeschool Schedule!
    • Book Clubs
      • Homeschool Book Club Ideas for Caddie Woodlawn
      • Homeschool Book Club: The Black Stallion!
      • “The Railway Children” Book Discussion
      • Epic “My Side of the Mountain” Book Discussion
      • How to Host a Twenty-One Balloons Book Discussion
      • Host A Kid’s Book Club with Summer of the Monkeys!
    • Crafts
      • How to Make D-I-Y Fall Leaf Lanterns with Kids
      • Beautiful Leaf Lantern Craft for Kids!
      • Air-Dry Clay Vintage-Style Ornaments
      • How to Make Dazzling DIY Snow Globes!
      • Beautiful DIY Nature Keepsake Ornaments
  • Party on Fern
    • How to Host a Little Bear Birthday Party!
    • A Narnia Party to Remember!
    • Calico Critter Birthday Party!
    • Best Classy & Unique Custom DIY Bridal Shower Activities!
    • How To Create an Enchanting DIY Unicorn Party!
    • The Most Charming DIY Horse Party!
    • The Most Delightful Woodland Animal-Themed Tea Party!
    • How to Create A Sweeter Than Honey Pooh Party!
    • Darling DIY Pooh Party!
    • Host A DIY Winter Princess Party!
    • Host A Delightful Galentine’s for Littles!
    • DIY Party Like A Panda Birthday!
    • Host an Adorable DIY BLUEY Party!
    • Host an Epic Galentine’s Party for Tweens!
    • Most Magical DIY Mermaid Party
  • Healthy Home & Fern Favorite Recipes
    • Christian Halloween Alternative: Blessings Day!
    • Simple, Joy-Filled Christmas Family Traditions!
    • Recipes
      • BEST Vegan Key Lime Pie!
      • Addicting Black Bean & Quinoa Salad
      • Favorite Fall Butternut Soup
      • Insanely Good 10-Minute Vegan Pumpkin Pie
      • Perfect Pumpkin Spice Muffins
      • Ultimate Fool-Proof Sugar Cookie Recipe (GF)
      • The Best Nutty Homemade Granola (GF)
    • Top 10 Nutrition Tips
    • My Top Nutrition Supplement Recommendations
    • Meaningful Holiday Gift Ideas

Air-Dry Clay Vintage-Style Ornaments

December 7, 2024 by Liza Leave a Comment

Sharing is caring!

5 shares

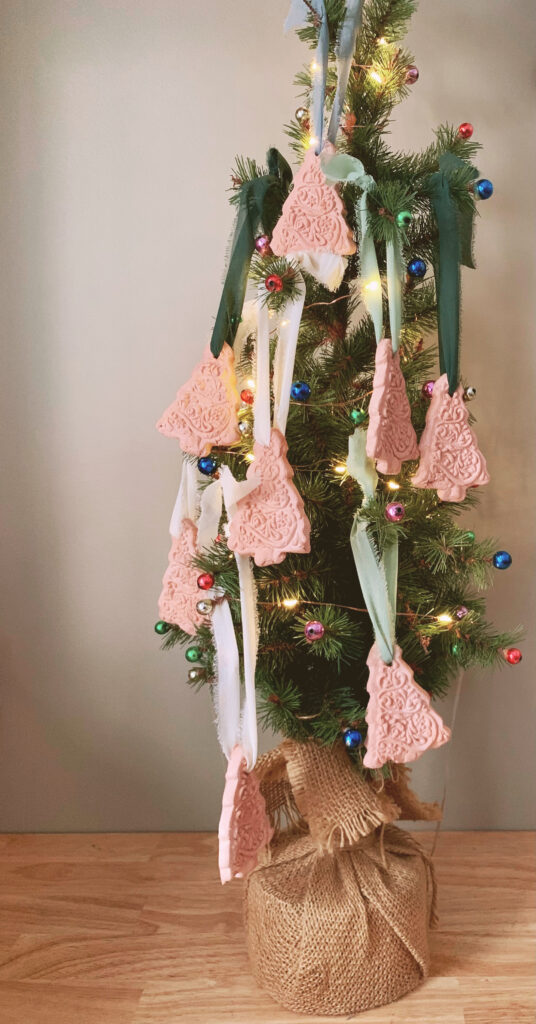
Every Christmas season, my kids and I enjoy making salt dough ornaments and decorating them. (You can find a recipe for salt dough ornaments in this article here.) This year, however – we wanted to try something a little different: An upgrade from salt-dough (in my opinion!) Salt dough is definitely a lot of fun, but these clay ornaments should last longer and I think they are so lovely! Using air-dry terracotta and white clay, these couldn’t be easier. Let me show you step-by-step how to make your own Air-Dry Clay Vintage-Style Ornaments! Absolutely perfect for gifting and/or decorating your own tree! I promise you’ll just love how they turn out!

This post contains affiliate links, which means I make a small commission at no extra cost to you. See my full disclosure here.

Supplies Needed for Making Terracotta Vintage-Style Ornaments:

air dry clay vintage-style ornaments supplies wooden stamp

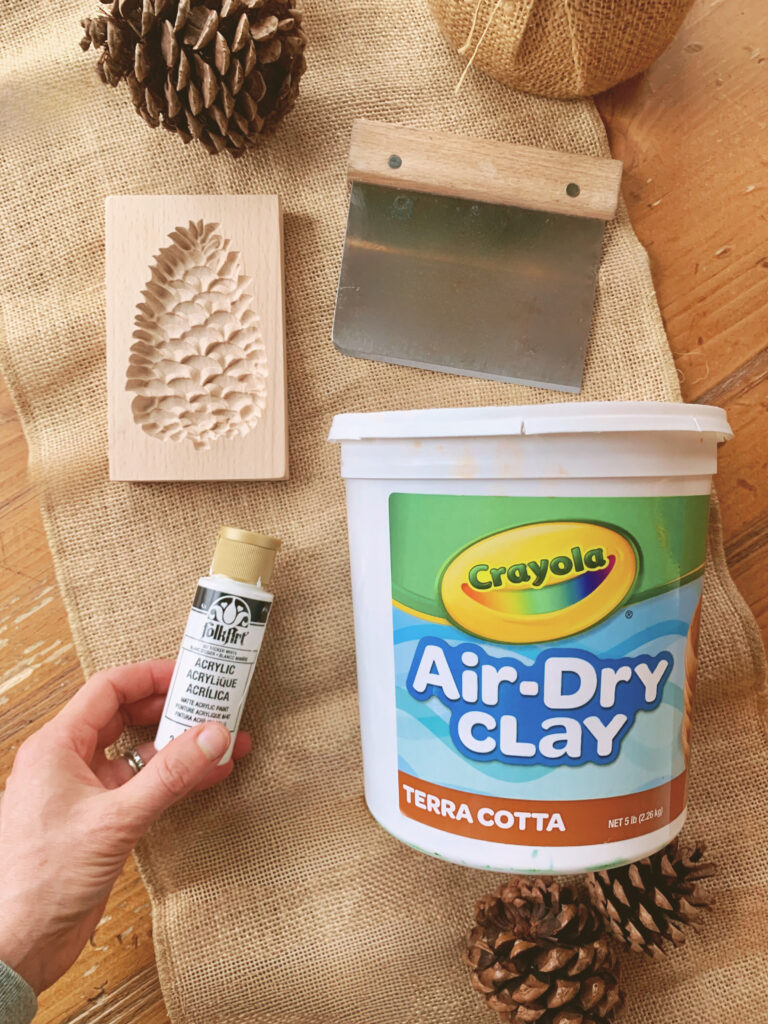
Air-dry clay – terracotta or white

Dough scraper

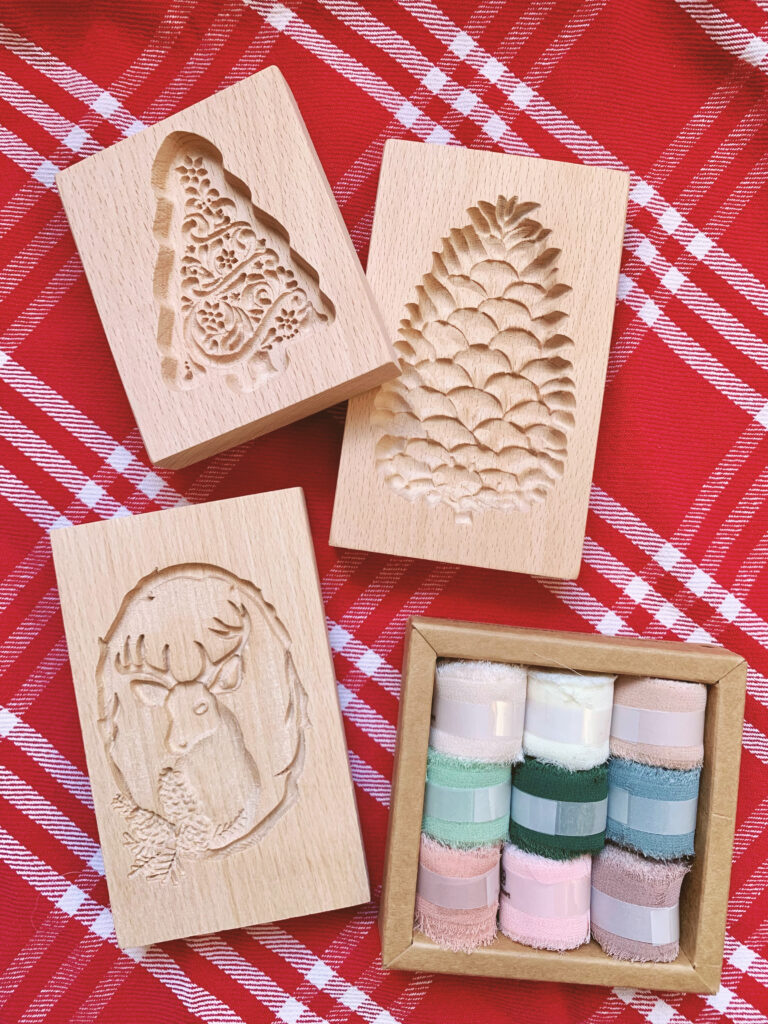
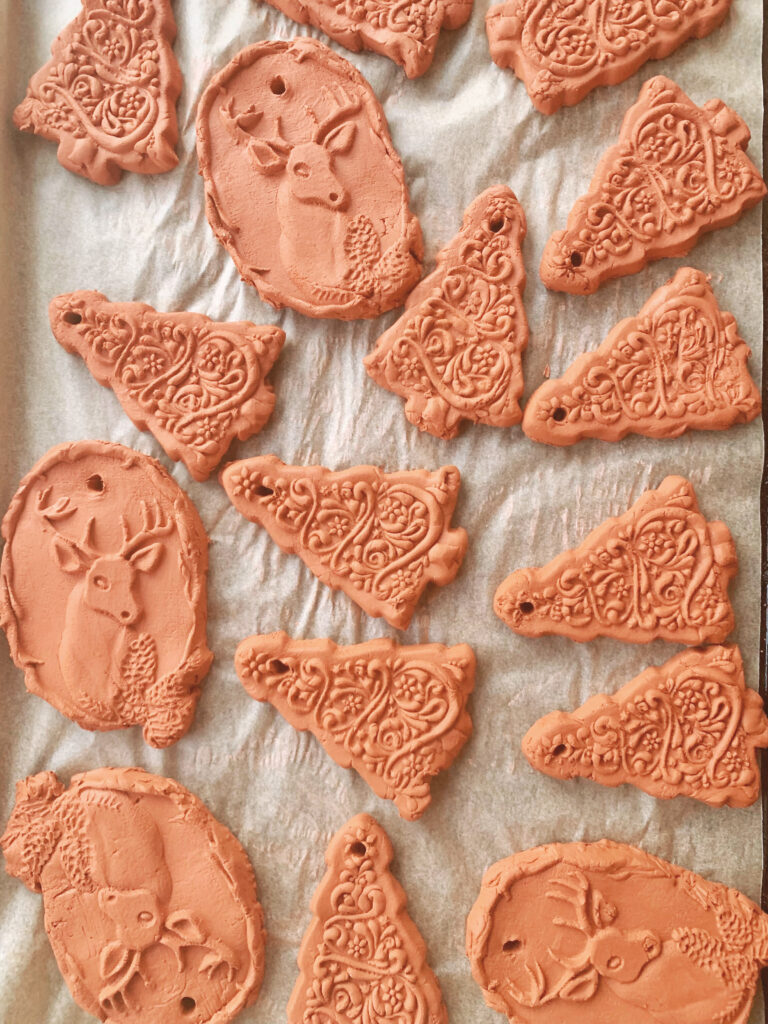
Wooden Pinecone & Christmas Tree Cookie Molds

Christmas Reindeer Cookie Mold

Wooden Santa Cookie Mold

Parchment Paper

Baking Sheet

Toothpick or straw for making a hole

Chiffon Ribbon for hanging

Cornstarch (optional)

Acrylic Paint (optional) We used watered-down white and gold

wooden cookie cutters and ribbon on red festive Christmas tablecloth

How to Make Air-Dry Clay Vintage-Style Ornaments

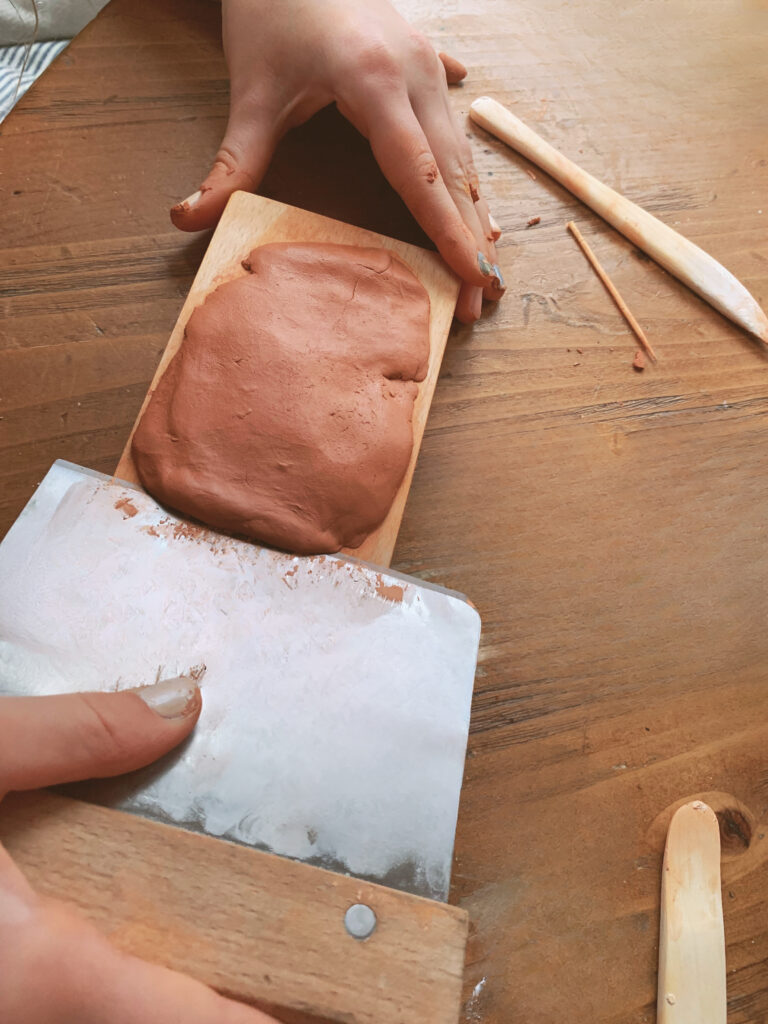
Take a handful of the clay and roll it into a ball.

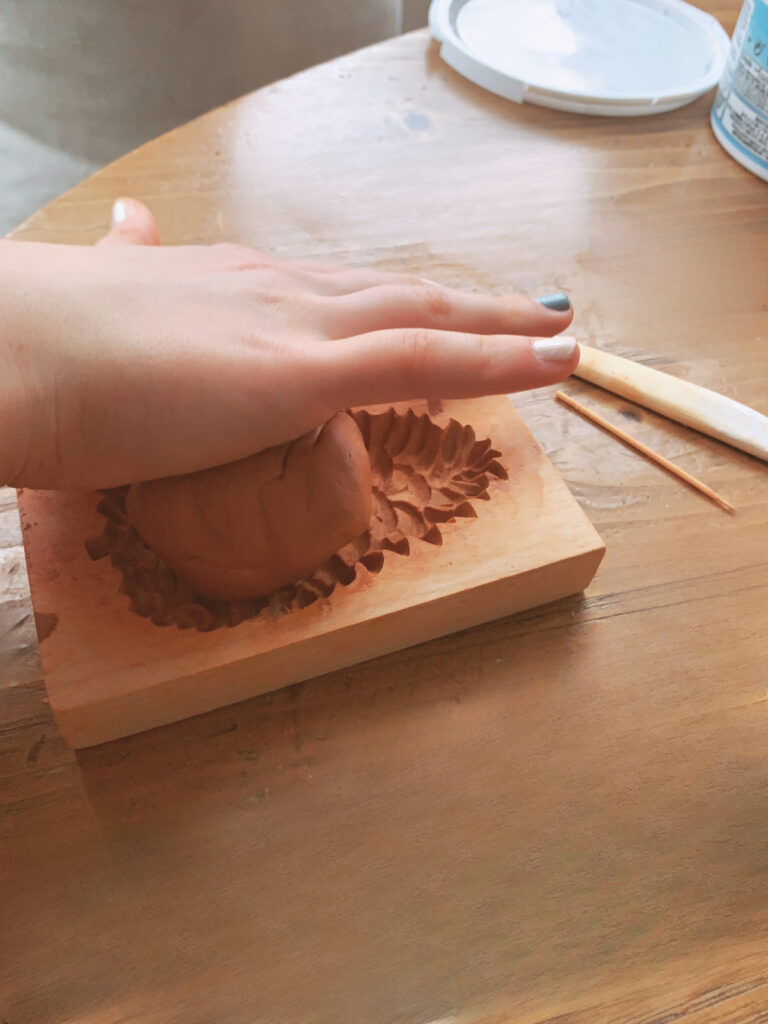
Next, using your hands you will press the ball of clay into your wooden cookie mold, covering the entire area. If you’re worried the clay may stick, you may lightly dust your mold with cornstarch. We did this the first time-around, but found we had no issues later on making them without the cornstarch.

fingers pressing terra cotta clay into mold

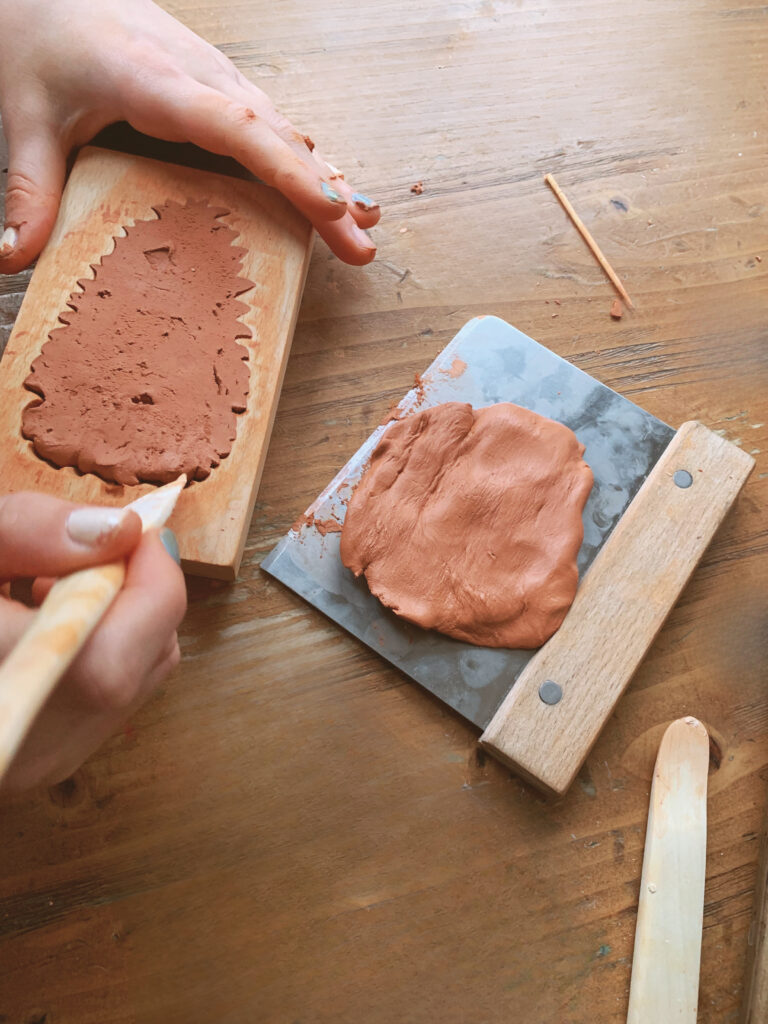
With your scraper, quickly scrape across the top of your mold. This will actually also help to loosen the clay inside of the mold, making it easier to remove.

scraping excess terra cotta clay off mold

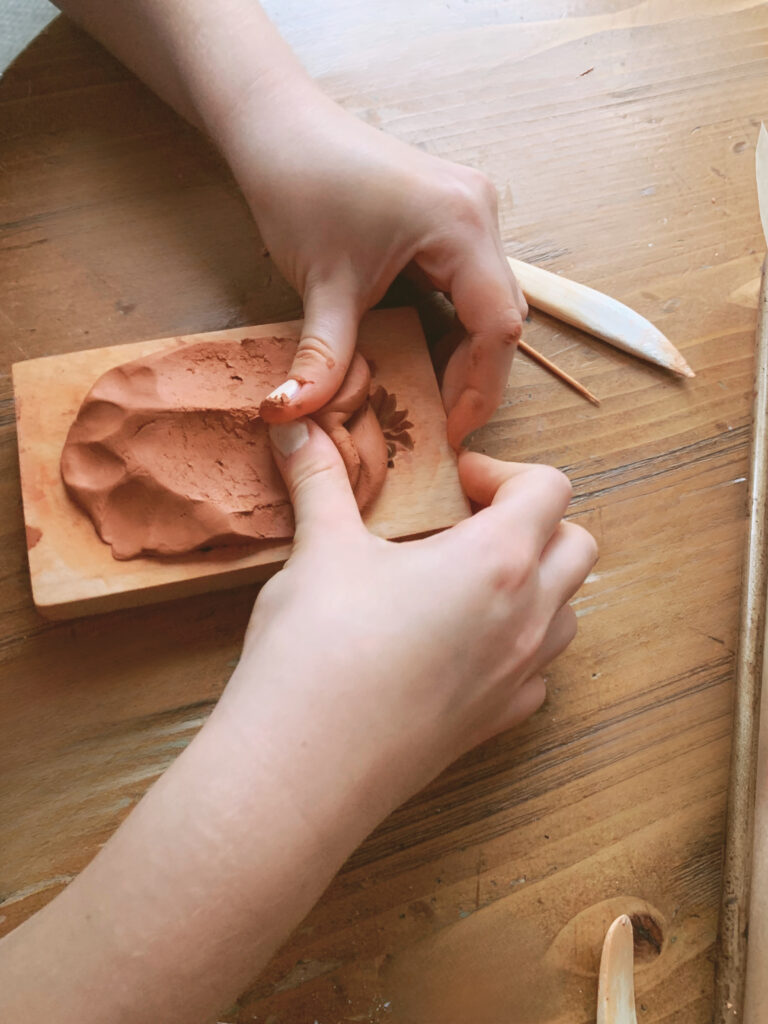
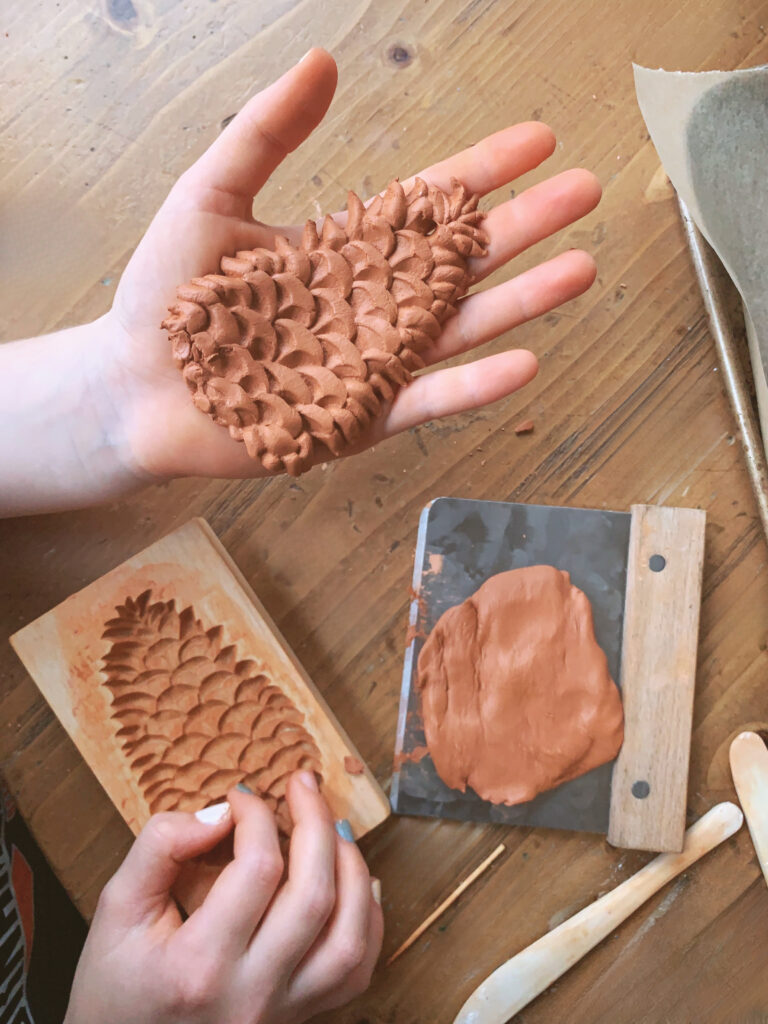
Carefully lift out your shape using a small clay tool or a butter knife. Use your fingers to reshape anything that may have moved while removing from the mold.

removing clay from mold with fingers and pottery tool

Use a straw or a toothpick to create a hole at the top of your ornament where you will use ribbon to hang them.

Lay your ornaments out on parchment-lined baking sheets to air dry! They will take about 24 hours total to dry completely, but I do recommend flipping them halfway through the drying process so that they will dry evenly on both sides. We also made some simple white air-dry clay ornaments from regular cookie cutters.

It’s Time to Paint Your Air-Dry Clay Vintage-Syle Ornaments!

Make sure that your ornaments are fully dry before painting them. I’ve found that acrylic paint works best on air-dry clay and salt dough.

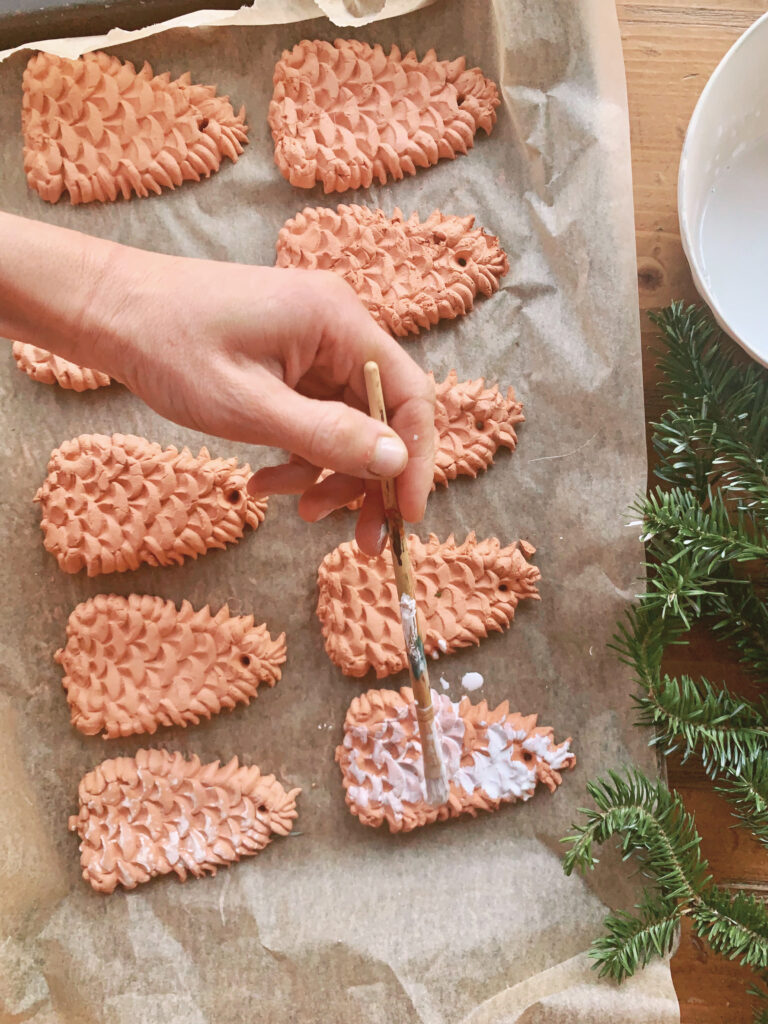
“Whitewashing” Your Terracotta Ornaments

For the terracotta-color ones, I wanted them to look aged so I simply diluted white acrylic paint with water, dabbing it onto the ornaments with a paintbrush. I dabbed off the excess but let some of the paint dry into the crevasses.

Painting White Air-Dry Clay Ornaments

I love the more natural look of my white air-dry clay ornaments and so we decide not to paint some of them. The nice thing about the white is that you do have the option to go painting full-color with them if you choose! For kids to paint them, this is probably your best option over the terracotta color. We actually experimented a little and painted some of the terracotta pinecones gold. We love how they turned out!

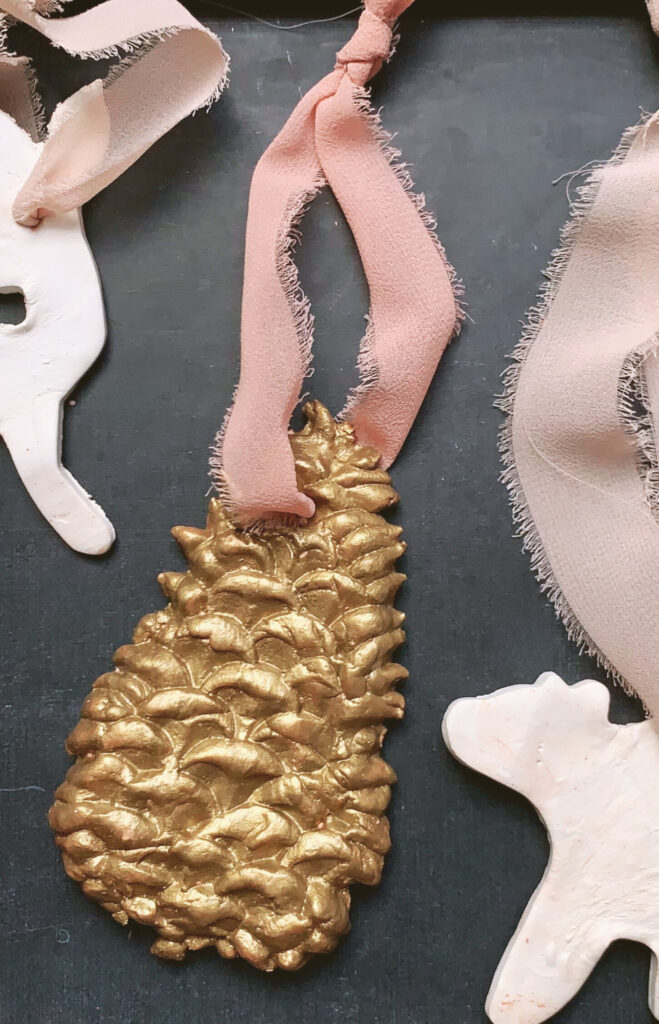
Choose Beautiful Ribbon to Hang Your Ornaments

Think of all the lovely types of ribbon you could use to tie up your ornaments. Festive plaids, velvet, chiffon in dark green, red, or pale neutral colors – the sky’s the limit! I chose to use silk chiffon.

Ways to Use Your Air-Dry Clay Vintage-Style Ornaments

As gifts or gift tags

Christmas decorations around your home

A craft project for any holiday party

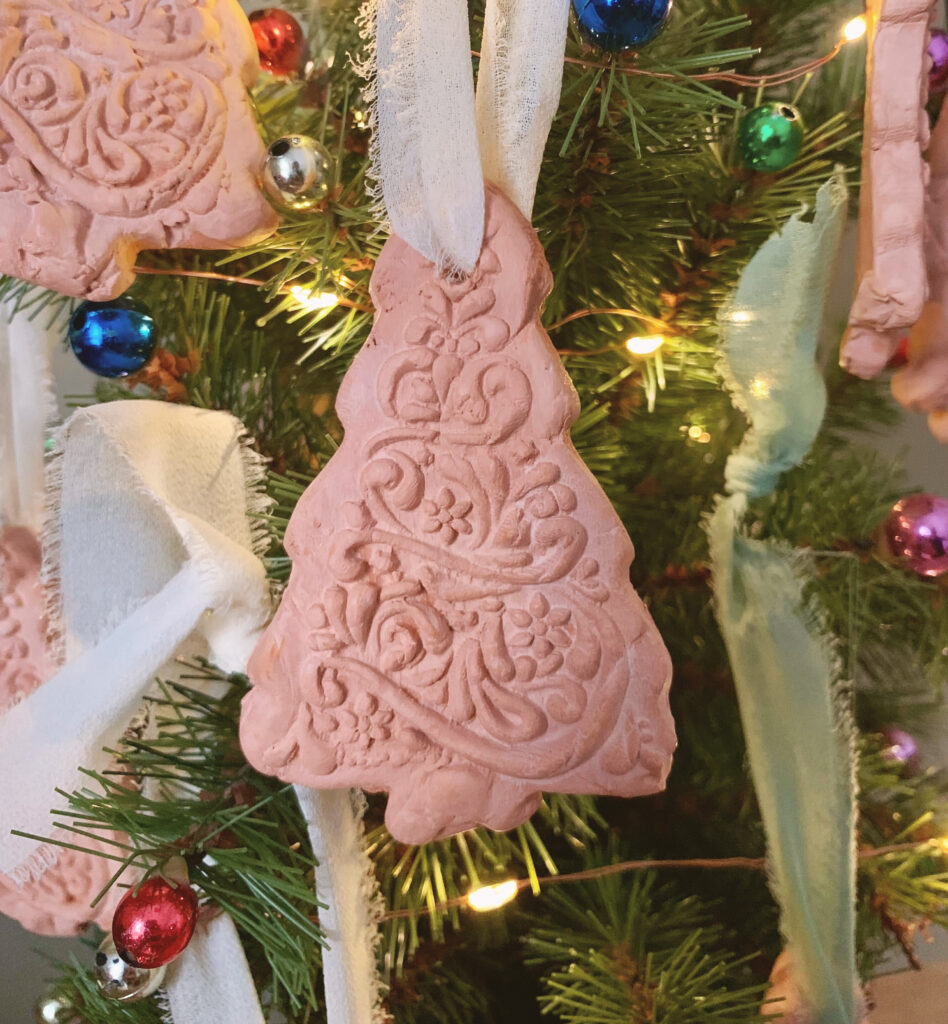
Decorating your tree

Sealing Your Ornaments

If you’d like to preserve and protect your ornaments even better, you might want to brush a sealant over them. I’d stick with a matte finish for this project.

Let me know if you try making any of these Air-Dry Vintage-Style Ornaments! I’d love to know how they turn out for you! As always, you can find more Fern craft ideas here!

Filed Under: Crafts, Home Education Tagged With: acrylic paint, air-dry clay, air-dry clay project, air-dry clay projects, air-dry clay vintage-style ornaments, best clay crafts, Christmas, Christmas crafts, Christmas projects, Christmas tree, clay, clay crafts, clay projects, DIY Christmas ornaments, DIY crafts, diy crafts for kids, DIY ornaments, DIY projects, DIY terracotta clay ornaments, DIY vintage ornaments, easy crafts for kids, homeschool crafts, pinecone, reindeer, salt dough, terracotta, terracotta clay ornaments, vintage, vintage-style, vintage-style ornaments, wooden cookie cutter

Previous Post: « Insanely Good 10-Minute Vegan Pumpkin Pie
Next Post: A Peek Inside Our Daily Homeschool Schedule! »

Reader Interactions

Leave a Reply Cancel reply

Your email address will not be published. Required fields are marked *

Recipe Rating


Primary Sidebar

Let’s Connect

  • Email
  • Facebook
  • Instagram
  • Pinterest

So glad you’re here!

Life on Fern Barn Family

Welcome to Life on Fern!

Welcome to Life on Fern Acres. I’m Elizabeth! Homeschool mom of 3, certified health coach, and lover of making beautiful things! Whether I’m planning a themed party or designing a kids bedroom, creating brings life to my soul! It’s my little break in the busyness of mom life. I love to find beauty in the mundane, and then to capture it with my camera! Read more

Footer

Copyright © 2025 lifeonfern.com on the Foodie Pro Theme

5 shares
  • Share
  • Pin
  • Email